Product Details
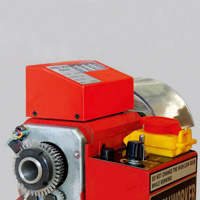
Products Name:SC2 Mini Lathe
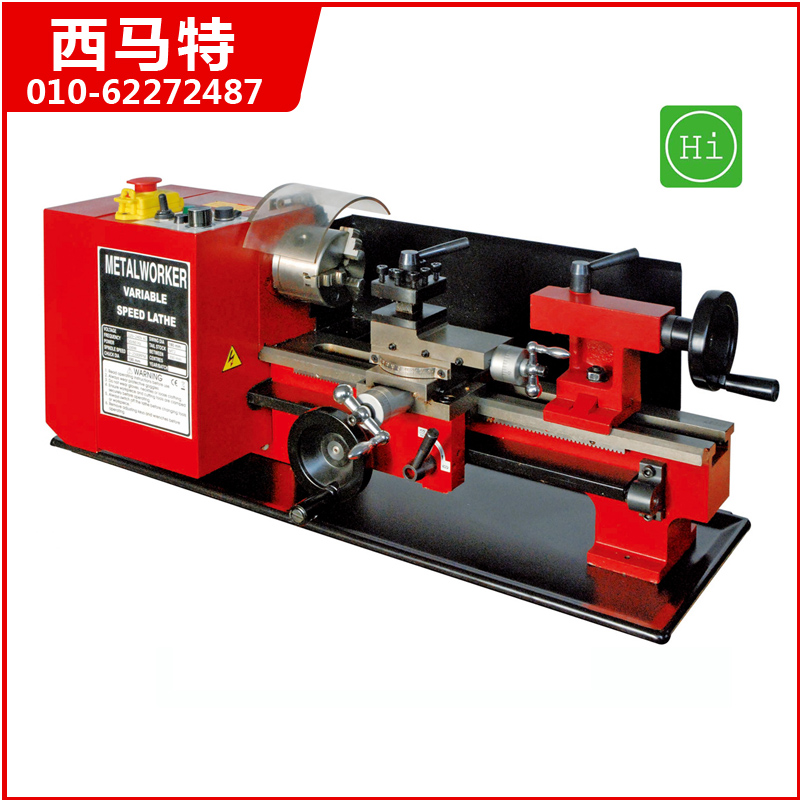
Key Feature:Constructed with cast iron giving great rigidity
Precision Vee bed with ground slide ways
High torque brushless DC 500W moto
Fully featured saddle and carriage assembly including powered lead screw
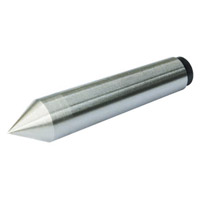
Supplied with, 80mm 3 jaw chuck,, 2MT centre, change wheel set, wrench set
Specifications
Swing over bed 180 mm
Distance between centers Model 300 300 mm
Model 350 350 mm
Hole through spindle 20 mm
Cross slide travel 65 mm
Compound travel 55 mm
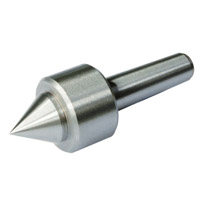
Spindle taper MT3
Tailstock taper MT2
Spindle speed (variable speed) 100-2500 ±10% rpm
Motor output power(Brushless motor) 500 W
Range of threads Metric version 0.4-2.0 mm (10 thread pitches)
Imperial version 12-52 TPI (18 thread pitches)
Overall dimension Model 300 720x300x290 mm
Model 350 800x290x290 mm
Weight(Net/Gross) Model 300 44/51 kg
Model 350 50/55 kg
Packing size (LxWxH) Model 300 780x420x390 mm
Model 350 870x360x380 mm
Optional Accessories
|
编号 |
项目说明 |
图片 |
适合车型 |
|
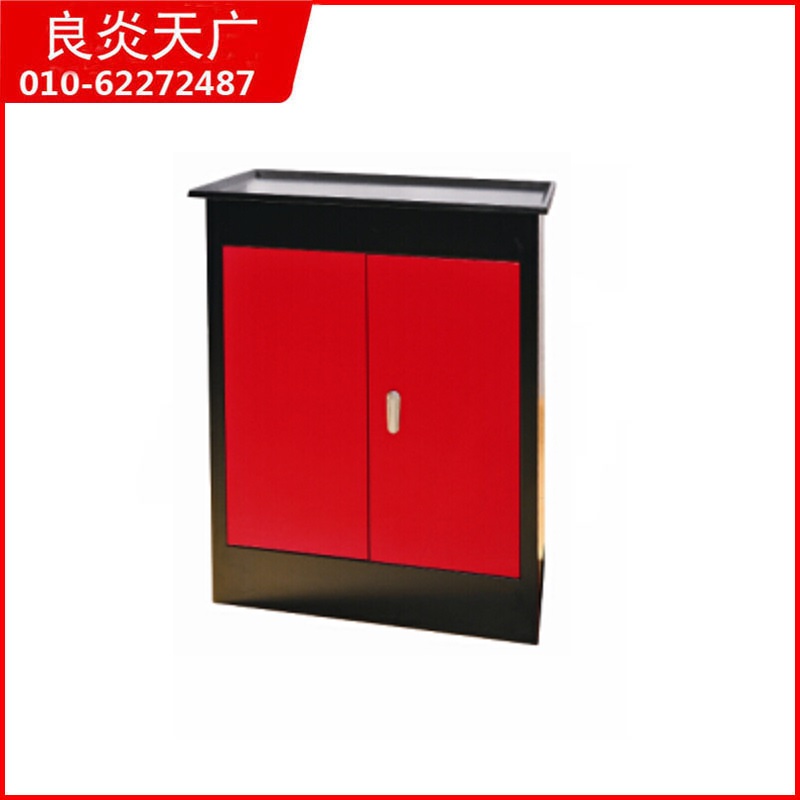
S/N:10000 |
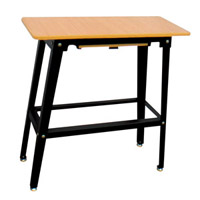
铁木工作台
整体外形尺寸:
800*350*890MM |
|
C0,C1,C2,SC2,C3
Z1,X0,X1,SX1,X2,SX2 |
|
S/N:10000A |
铁木工作台
整体外形尺寸:
1000*660*710毫米
|
|
C0,C1,C2,SC2,C3
Z1,X0,X1,SX1,X2,SX2 |
|
S/N:10001 |
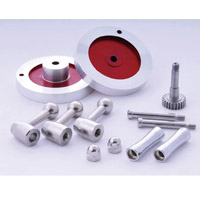
旋钮和手轮 |
|
C2,C3,SC2,SC3 |
|
S/N:10002 |
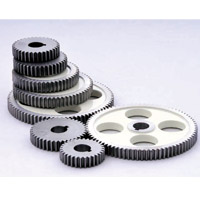
公制齿轮9个
30T/35T/40T
40T/45T/50T
60T/80T/80T |
|
C2,C3,SC2,SC3 |
|
S/N:10003 |
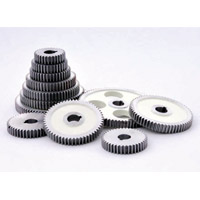
英制齿轮13个产品
30T/35T/40T/40T
45T/45T/50T/55T
57T/60T/65T/80T/80T
|
|
C2,C3,SC2,SC3 |
|
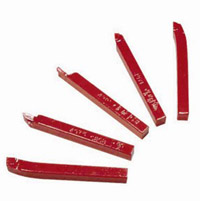
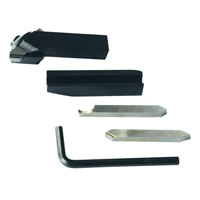
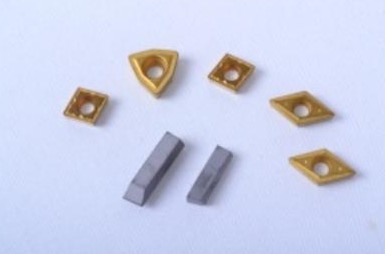
S/N:10004 |
车刀5件套装
DIN 4971R外圆偏车刀
DIN 4975 外螺纹60度车刀
DIN 4980R外圆90度偏刀
DIN 4980L外圆左车刀
DIN 4981R切断刀
|
|
C0,C2,M1,SC2 |
|
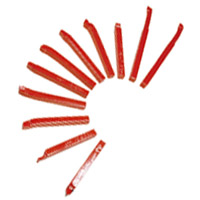
S/N:10005 |
车刀11件套装
DIN 4971R外圆偏车刀
DIN 4972R弯头45度车刀
DIN 4973R内孔车刀
DIN 4974R内孔平面车刀
DIN 4975 外螺纹60度车刀
DIN 4976 宽刃光口刀
DIN 4977R外圆90度偏刀
DIN 4978R端面90度车刀
DIN 4980L外圆左车刀
DIN 4980R外圆90度偏刀
DIN 4981R切断刀 |
|
CO,C1,C2,SC2,C3 |
|
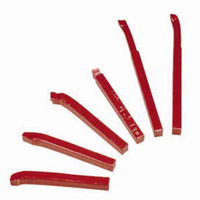
S/N:10006 |
车刀6件套装
DIN 4972R弯头45度车刀
DIN 4973R内孔车刀
DIN 4974R内孔平面车刀
DIN 4976R宽刃光口刀
DIN 4977R外圆90度偏刀
DIN 4978R端面90度车刀
|
|
CO,C2,SC2 |
|
S/N:10007 |
|
|
C2,C3,SC2,SC3 |
|
S/N:10007A |
|
|
C2,C3,SC2,SC3 |
|
S/N:10008 |
中心架 |
|
C2,C3,SC2,SC3 |
|
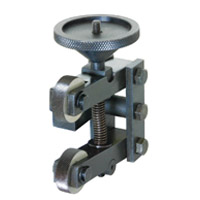
S/N:10009 |
跟刀架 |
|
C2,C3,SC2,SC3 |
|
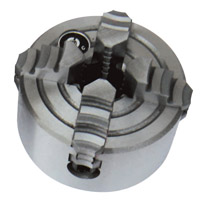
S/N:10010 |
¢80毫米四爪卡盘 |
|
|
|
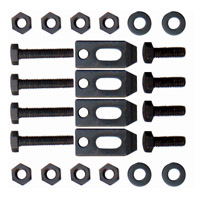
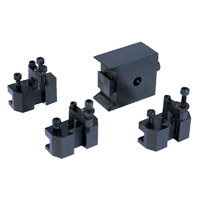
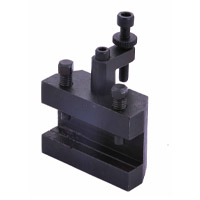
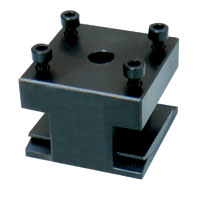
S/N:10011 |
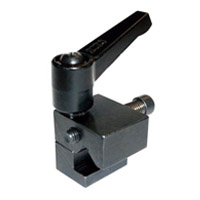
快速改变刀座 |
|
C2,SC2 |
|
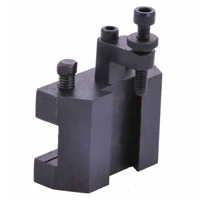
S/N:10011-1 |
刀架 |
|
C2,SC2 |
|
S/N:10011-2 |
刀架 |
|
C2,SC2 |
|
S/N:10012 |
|
|
C2,SC2 |
|
S/N:10013 |
|
|
C2,SC2,C3 |
|
S/N:10014 |
|
|
C2,SC2,C3 |
|
S/N:10015 |
车床勾 |
|
C1,C2,SC2,C3,M1 |
|
S/N:10016 |
2件套装刀具 |
|
C2,SC2, |
|
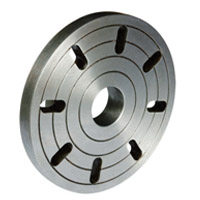
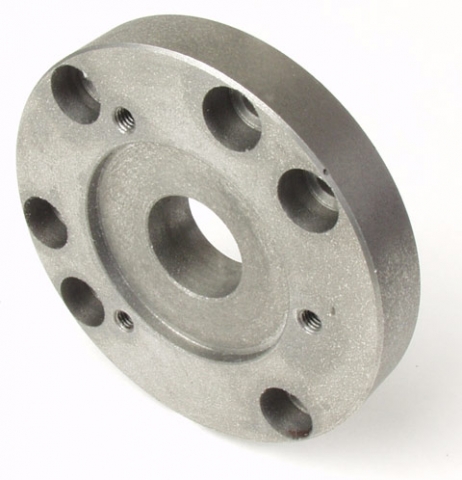
S/N:10029A |
¢100毫米四爪卡盘,法兰 |
|
C2,SC2,C3 |
|
S/N:10061 |
|
|
C2,C3,SC2,SC3 |
|
S/N:10062 |
数字式主轴速度读出 |
|
C2 |
|
S/N:10064 |
|
|
C2,C3,SC2,SC3 |
|
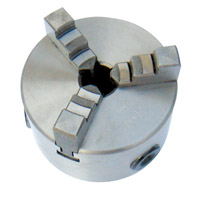
S/N:10100 |
¢100毫米3爪卡盘 |
|
C2,SC2,C3 |
|
S/N:10100A |
¢100毫米3爪卡盘和法兰 |
|
C2,SC2,C3 |
|
S/N:10130 |
滚花刀 |
|
C2,SC2 |
|
S/N:10131 |
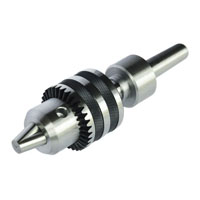
圆磨削附件 |
|
C2,SC2,C3 |
|
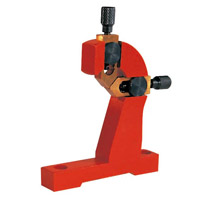
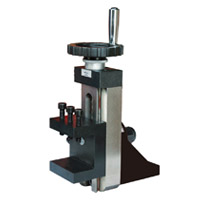
S/N:10136 |
摇臂刀架 |
|
C2,C3,SC2,SC3 |
|
S/N:10140 |
XY数显组件
DRCD套件 |
|
C2,SC2,C3 |
|
S/N:10147 |
|
|
C2,SC2,C3 |
|
S/N:10148 |
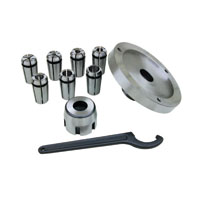
弹性夹头组(公制)
卡盘dia.4,6,8,10,12,14,16毫米 |
|
C2,C3,SC2,SC3,C3 |
|
S/N:10182 |
定位器 |
|
C2,C3,SC2,SC3 |
|
S/N:10200 |
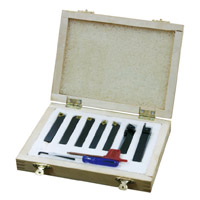
组合刀具8毫米(镀锡)
DIN 4977R外圆90度偏刀
DIN 4980L外圆左车刀
DIN 4980R外圆90度偏刀
DIN的4975R外螺纹车刀
DIN 4981R切断刀
|
|
C1,C2,SC2 |
|
S/N:10200-1 |
替换刀头 |
|
C1,C2,SC2 | 底座:S/N:10253C (860X310X890MM)
Review
Sieg SC2 7x12 Mini Lathe with Brushless Motor

Introduction (09/07/09)
It's been a busy summer. My wife and I celebrated our 40th anniversary and, with our son and his wife, the birth of our sixth grandchild (his first, he has three sisters). So that's my excuse for not reporting sooner on this exciting new lathe offering from Sieg.
Since I first started reporting on mini-lathes, back in 1999, Sieg has steadily improved the quality, safety and features. Recently, a manager at their plant advised me that their engineers have been intensely at work developing an improved motor drive - both for the mini-lathe and the mini-mill.
The new SC2 model 7x12 mini lathe is similar in many respects to its predecessors, but features a completely new brushless DC motor. While they are more expensive than conventional motors, and require a specialized power supply to operate, brushless motors have some compelling advantages over conventional brush-type DC motors, including gobs of torque. With much higher torque, the drive train can be simplified: gone is the familiar HI/LO gearshift handle on the back of the headstock.
 
At first glance, the new SC2 model looks very similar to prior models, but a closer examination reveals that the power supply housing, electronic controls and motor drive are all of a new design. So let's dig in and find out what these changes mean to the operator.
General Construction
The physical construction of the new SC2 model mini lathe is very similar to earlier models. For this reason, I won't go into a lot of detail about the mechanical aspects and setup of the lathe, as they have been described in previous articles:
- Grizzly 7x12
- Homier 7x12 (new style)Harbor Freight 7x10
Compared to my first mini-lathe, purchased in 1999, this new one has very good fit and finish and is pretty much ready to use after cleaning off the red packing grease. As always, though, it's a good idea to check out all of the moving parts to make sure everything operates smoothly and securely before turning on the power or attempting to do any machining.
All of the Sieg lathes made since around 2005 have improved safety features including:
- Chuck guard to prevent lathe from starting while chuck key is in the chuck
- Emergency cut-off quick-stop switch cover
- Electrical interlock requires resetting power switch before starting the lathe
- Spring on chuck key prevents it from being left in the chuck
These features go a long way towards averting some of the most common safety hazards of working with the lathe.
Another feature that I was glad to see is a full-length chip guard over the leadscrew. Aside from just keeping the leadscrew clean, this guard, along with a rubber seal on the power supply housing, greatly reduces the risk of metal chips finding their way into the electronic power controller.
 Lead screw cover Lead screw cover
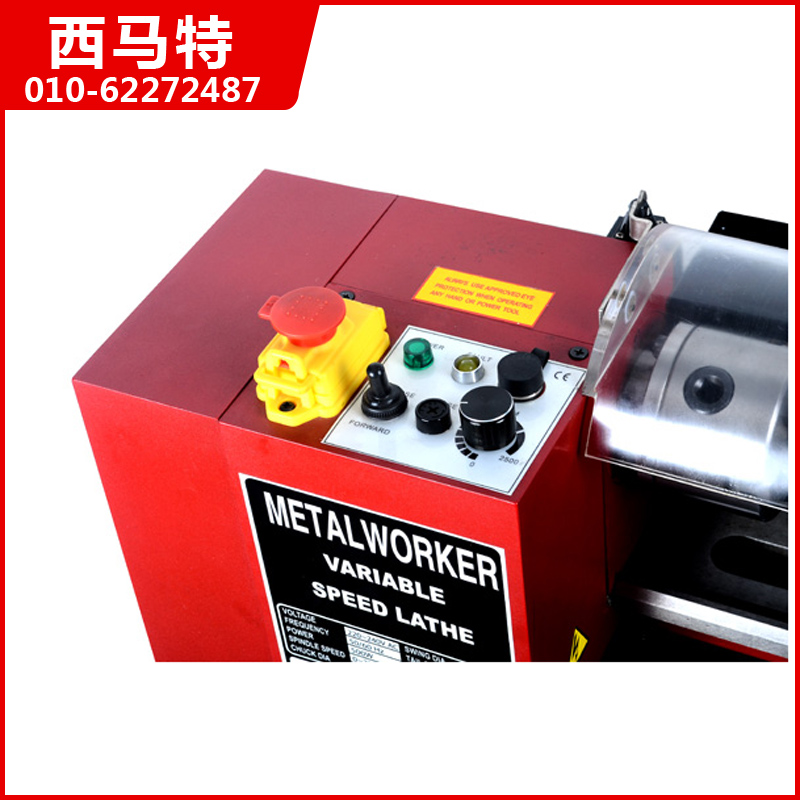
Electronic Controls
The main control panel has a clean and effective layout

The controls are as follows:
- On/Off power switch and emergency stop button
- Power pilot lamp
- Fault indicator lamp
- Tachometer port
- Forward / Reverse switch
- Fuse holder
- Speed control
Power Switch
The power switch is the same type that has become familiar to mini-lathe and mini-mill users for the last five years or so. Underneath the hinged cover are the main On / Off power control buttons, sealed from chips and lubricants by a tough rubber-like membrane.
 On / Off power switch and cover On / Off power switch and cover
Power to the lathe is turned on by lifting the switch cover and pressing the green "ON" button, which illuminates the green pilot lamp. Pressing the red button turns off the power at the end of a work session or anytime you want to be sure that the lathe is completely stopped. Under normal operations, users may find it convenient just to turn the speed control to zero, which will stop the chuck for changing the workpiece, cutting tool, etc. In operation, the hinged cover lies loosely over the ON/OFF buttons. Should an emergency arise (e.g. the workpiece is not secure in the chuck) the lathe can quickly and safely be stopped by mashing the red safety cover with the heel of the hand.
For extra safety when the lathe is not in use, especially in a home where young children may be in the shop, a small padlock can lock the cover down to prevent the lathe from being turned on.
Forward / Reverse Switch
Encased in a flexible rubber membrane cover to keep out oil, cutting fluids and swarf, the Forward/Reverse switch has some new tricks. On earlier models of the mini-lathe, the lathe must be completely stopped before changing the position of the F/R switch. Flipping the switch while the motor is running would very likely blow the fuse and potentially could damage the power supply if the motor was running at moderate or high speeds.
This new model lathe has a much more sophisticated power supply and, like the larger and more expensive C4 lathe, can be switched between forward and reverse while the lathe is spinning. When the direction is changed, the power supply brakes the chuck to a full stop, reverses direction and ramps back up to the original speed.
With the powerful torque at low RPMs that the new motor provides, this should be a great setup for cutting threads with a tap: just flip the switch to Reverse to back out the tap and clear the chips from the hole; flip the switch again to resume cutting the threads to the desired depth.
Fault Indicator Lamp
The Fault Indicator lamp illuminates when the motor is stalled. This could happen, for example, if the cutting tool was plunged deeply into the workpiece, causing the motor to stop suddenly. The power supply automatically senses when it is overloaded due to a stall and shuts down. A stall also resets the On/Off switch, requiring the ON button to be depressed again to restart the lathe and reset the Fault Indicator lamp.
Optional Digital Tachometer
Located at the upper right corner of the control panel, the tachometer port is sealed by a tethered plastic cap. Open the cap, and you can plug in the optional digital tachometer display. The plug is locked in place by a threaded retaining ring. Regular readers of mini-lathe.com know that I don't think a tach is essential for getting good results, but, especially for beginners, it is helpful in establishing what cutting speeds work best for various materials and for setting the speed to a desired RPM based on cutting-speed charts or your own experience.
  Connector port for optional tachometer Connector port for optional tachometer
On the back side of the tachometer housing are three magnets for attaching the tach to the top of the headstock. While they hold the display firmly in place, the display window then is oriented straight up, which is inconvenient for viewing unless you're a lot taller than I am. This was easily fixed to my satisfaction by simply mounting the tach display on a V-bent angle bracket made from some scrap steel sheet metal.
  Tach display mounted on headstock Tach display mounted on headstock
Although the display background looks green-gray in the photo above, in real life the digits are black against a blue background. This shows up better when the camera flash is turned off.

Brushless Motor and Power Supply
Most significant of the new features on this lathe, of course, is the brushless motor. Brushless motors are completely sealed, so they are virtually immune to dirt and grit: a critical advantage in shop environments filled with tiny particles of metal, solvents and other stuff unfriendly to the innards of a motor. The motors are cooled by thermal conduction and convection via the aluminum motor housing. For a given size and weight, they produce more power and torque than a brush-type motor.
 Sealed, brushless motor Sealed, brushless motor
The motor is mounted to a heavy steel plate, approximately 3/16" thick, which looks strong and secure.
 Original motor drive, for comparison Original motor drive, for comparison
If you're reading this, there's a good chance that you already know a lot about electric motors (maybe a lot more than I do!) But just in case, I'll give you a little bit of background info. On most electric motors made since the days of Edison and Tesla, the rotating shaft has a soft iron core wrapped with many windings of copper wire. Electric current flows through the copper wire to produce a magnetic field that causes the shaft to rotate.
Trouble is, electricity must somehow still be supplied to those windings that are now rotating at fairly high speed. Brushes are a type of "floating" contact that conduct the electricity while still allowing the shaft to rotate. On most motors, they are made from a tough graphite compound, not unlike a large, industrial-strength pencil lead, that under spring pressure, press against contacts attached to one end of the shaft. The contacts act like a switch, continually turning the rotating coils on and off, to apply the magnetic field at just the right time; somewhat like the rhythm of pushing a child on a swing.
In the brushless motor powering the SC2, the wire coils are mounted to the outside frame and don't move. Powerful permanent magnets are configured as part of the rotating shaft. A specially designed power supply applies pulses of current to the coils at just the right time to apply force to the rotating permanent magnets. In this arrangement, there is no need for contact brushes.
The motor is pretty quiet - about like a sewing machine- when the leadscrew is not engaged, although I'm not sure how many readers nowadays have heard a sewing machine in operation. It's a little louder, due to noise of the gear train, when the leadscrew is engaged. In any case, it's quiet enough that you could use it in a small apartment without bothering your neighbors or waking up kids sleeping in a bedroom next door. Since the power supply doesn't need a cooling fan, when the lathe is stopped, it's silent.
In practical terms, this new motor design provides more power than the older style motors. So much so, that the HI/LO gear train is no longer needed. Veterans of the 7x lathes know that they never supplied quite as much torque as you would like. For most work, this was not a problem, but with work of 4" diameter or larger, the motor could easily bog down, forcing you to take shallow cuts and take more time to complete the job at hand. Mini-lathe owners being natural tinkerers and problem-solvers, a number of owners devised their own gear and belt speed-reduction modifications to address this concern.
I was anxious to see how well this new motor worked in practical application. The short answer: very well.
I had a piece of scrap aluminum about 4" in diameter. Conveniently, it already had a recessed shoulder so I could grip it from the inside using the inside chuck jaws and opening them outward to grip the shoulder. I took a few test cuts of just a few thous, using my Quick Change Tool Post (QCTP) to hold the cutting tool. The cool thing about this motor and power supply is that, like the similar setup on the larger C4 lathe, its really hard to bog down. As you apply more cutting force, say by taking a deeper cut, the power supply detects the initial slowdown due to the increased load and instantly increases power to compensate and hold the RPMs at the set point.
 Turning a 4" diameter workpiece Turning a 4" diameter workpiece
As veteran users know, to get enough clearance for the tool on large (mini-lathe scale) workpieces (i.e. 4" dia. or more) you have to angle the compound backwards. One problem I ran into (or nearly did) was the chuck interlock shield. It extends a little beyond the front face of the chuck and would have been in the way of my tool holder had I not lifted it a little. Looks to me like the shield could be cut back by about 1/2" to 3/4" to solve this problem. Later.
 Chuck shield extends beyond chuck face Chuck shield extends beyond chuck face
I took several cuts of 0.010 depth on the cross-slide (i.e. removing .020 from the workpiece diameter) and the motor didn't seem even to notice. I increased the depth of cut to .020 and it still just powered through like it was butter. A cut that deep on the standard mini-lathe probably would stall the lathe and might even blow the power supply fuse.
 Beefy cuts for such a small lathe Beefy cuts for such a small lathe
I ran out of time before I had a chance to see how much deeper these cuts could go. Maybe I'll add more on that later.
Update 09/10/09
Over the last few evenings I did some additional work with larger diameter workpieces. In the scrap box I found a nice 6" aluminum disk that looks like it was originally cut from 5/8" plate. It has a 3" diameter center hole convenient gripping with the chuck.
On this workpiece, the extended length of the chuck guard was more of a problem: it was in the way of mounting the workpiece in the chuck. Some quick work on the bandsaw and sander remedied that problem which I'm confident that Sieg will address in later models.
 Chuck guard in the way of the workpiece Chuck guard in the way of the workpiece
 Cut-down chuck guard Cut-down chuck guard
Since I now have the larger C4 and C6 lathes in my shop, I don't need to use the 7x mini-lathe for work larger than 4" in diameter. I had forgotten some of the challenges to go along with that on the 7x lathe. The problem is that even with the cross-slide cranked all the way back as far as it will go, the cutting tool is not far enough back to work on the outer diameter of a large workpiece. Part of the solution is to swing the compound around so that the handwheel is back over the ways, but you can only go so far until the rim of the handwheel hits the side of the cross-slide. Some experimenting showed that the optimum angle is about 40� as measured on the protractor. But even using this trick, I still could not get the toolpost back far enough.
 Compound reversed to provide clearance Compound reversed to provide clearance
Some years ago I made a special offset toolholder for exactly this purpose. A little crude, perhaps, but it does the job, giving me about an extra inch of clearance. If you can find a chunk of aluminum about the right size, you can make one with a hacksaw and the mini-lathe. First the hole for the toolpost bolt was drilled, then the hole for the tool bit was drilled by clamping a drill bit in the lathe chuck and clamping the tool holder onto the toolpost. Finally, the hole was squared off using a lathe bit ground to work like a shaper cutter. I think I held the tool in a 4-jaw chuck and advanced the round hole against the tool using the carriage handwheel - it's been so many years that I can't remember.
 Home-made offset tool holder Home-made offset tool holder
OK, with the tool now far enough out, let's cut some metal. Actually, I already did, and, as you can see in the second photo above, I got a nice clean cut using this arrangement. I tried cuts of up to .010" (removing .020 per pass) without much problem. There was some chatter with the deeper cuts but I found that I could minimize the chatter by adjusting the RPMs while cutting. At certain speeds, the chatter was minimized and almost gone.
 Taking a cut of .010" Taking a cut of .010"
I used speeds of from 300 to 600 RPM with 500 RPM seeming about optimal and never noticed any tendency for the motor to bog down. Purists, of course, can consult a table of cutting speeds for the material being cut (6060 aluminum in this case) and set the theoretical optimum speed using the tach. On a small lathe like this, though, unlike large industrial lathes, the theoretically "best" speed may not be the real best speed, if it happens to correspond to resonance where chatter is maximized. But the good part is that you can play around as much as you like and learn what works.
 After a finishing cut of .002" it looks pretty good! After a finishing cut of .002" it looks pretty good!
Power Supply
Inside the electronics box we find the power supply. It's quite a lot more sophisticated than the early ones, especially if we go back to the one from my first mini-lathe from 1999. This one has automated overload protection. If the lathe stalls, the fault light illuminates and a relay trips to shut off the power supply. Once the overload condition is corrected, the lathe is reset by pressing the green ON button.
 SC2 power supply SC2 power supply
 Mini-lathe power supply ca. 2002 Mini-lathe power supply ca. 2002
 Mini-lathe power supply, ca. 1999 Mini-lathe power supply, ca. 1999
As I mentioned earlier, I won't go into a lot of detail about the features of this lathe that are essentially unchanged from earlier models. In the sections below, I've provided a few photos of the new lathe. For more info, check out these reviews of earlier Sieg-made mini-lathes:
- Grizzly 7x12
- Homier 7x12 (new style)Harbor Freight 7x10
Headstock and Change Gears
The high torque of the new brushless DC motor precludes the need for the HI/LO speed change lever. In actual practice, I found that I very rarely used the HI range; it was simply too fast for most operations other than polishing or perhaps drilling with a very small diameter drill. On the other hand, the LO range never had quite enough "oomph" for those tough turning jobs where you want to take a deep cut, or were working on a large diameter (by mini-lathe standards) workpiece of 4" or more. While it's possible, with some finagling, to turn or face a 7" disk on the 7x mini-lathes, the torque imposed on the spindle limits you to very shallow cuts if you are to avoid stalling the motor.
I haven't (yet) opened up the headstock on the SC2, but it's reasonable to assume that inside you'll find that the spindle extends straight through, without the change gears on the older versions, extending from the back end of the spindle to the chuck mounting plate.
The change gear drive train for power feed and threading is basically unchanged from the earlier 7x lathes. The aluminum housing that supports the directional change lever is shaped a little differently, but that's about it.
 Change gear drive train Change gear drive train
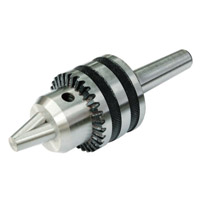
Spindle & Chuck
As on earlier models, the standard chuck is a 3" 3-jaw including both inside and outside jaws.
 Standard 3" 3-jaw chuck Standard 3" 3-jaw chuck
As on all of the newer lathes, a hinged guard made from tough polycarbonate plastic must be lowered in place in order for the lathe to operate. This guard prevents the lathe from being started if the chuck key is left in the chuck. That's unlikely to happen, now, since the newer lathes have a spring attached to the tip of the chuck key that pops it out of place in the chuck if you attempt to leave it in the chuck. Although this takes a little getting used to, its beats launching a chuck key into your head.
 
On the back side of the lathe, the chuck guard attaches to an interlock switch. Once the guard is opened, the green power button must be reset to restart the lathe.
 Interlock switch for chuck guard on rear of headstock Interlock switch for chuck guard on rear of headstock
Carriage, Cross-Slide, Compound, Toolpost, Tailstock.
The carriage, cross-slide, compound, toolpost and tailstock are the familiar standard design.
 
Conclusion
While we've seen continual safety improvements to the mini-lathe over the last five years, the SC2 is a much more substantial advancement. Due to it's comparatively massive construction, the mini-lathe has always been a real workhorse. Now, with it's dramatically more powerful motor, electronic braking and instant reverse, it's moved to a new level. Jobs on larger diameter (3"+) workpieces that used to take hours, will now be done in 1/2 or 1/4 the time that they used to take. With shop time being precious for most of us, that's a real bonus. (Plus you may save a few bucks on blown fuses.)
With this new model, Sieg continues their trend of steady improvement to a solid basic lathe design. This concerns me. If they keep at it, eventually we'll have no need to make mods. Then we'll be forced to find actual machining projects to pass those long winter nights. Seriously, though, this is a great little lathe, with enough power to make life fun again.
Availability
Update 11/08/10
I'm late posting this update: LMS has been selling the SC2 (and the SX2 mill) since around July 2010. Another option, the Micro-Mark 7x16, is the same lathe but with a longer bed and a few other features unique to Micro-Mark. At this time, I'm not aware of any other US distributors.
End of update
Since publishing this article, I've gotten quite a few email inquiries about where and when the SC2 will be available. The SC2 is a very new product and Sieg is in the process of establishing dealerships worldwide. This is normally a process that takes a few months, and is a little slower at present due to the sluggishness of the global economy.
So, the answer at the moment is that you can't get one just yet, but I'll post information on mini-lathe.com as that situation changes.
And, if you happen to be a dealer, or are interested in becoming one, Sieg is actively seeking dealers for the SC2, so please contact them directly, or email me and I will forward the information to the proper staff.
|